
Remove Stains from Old Photos: Physical & Digital Repair Guide
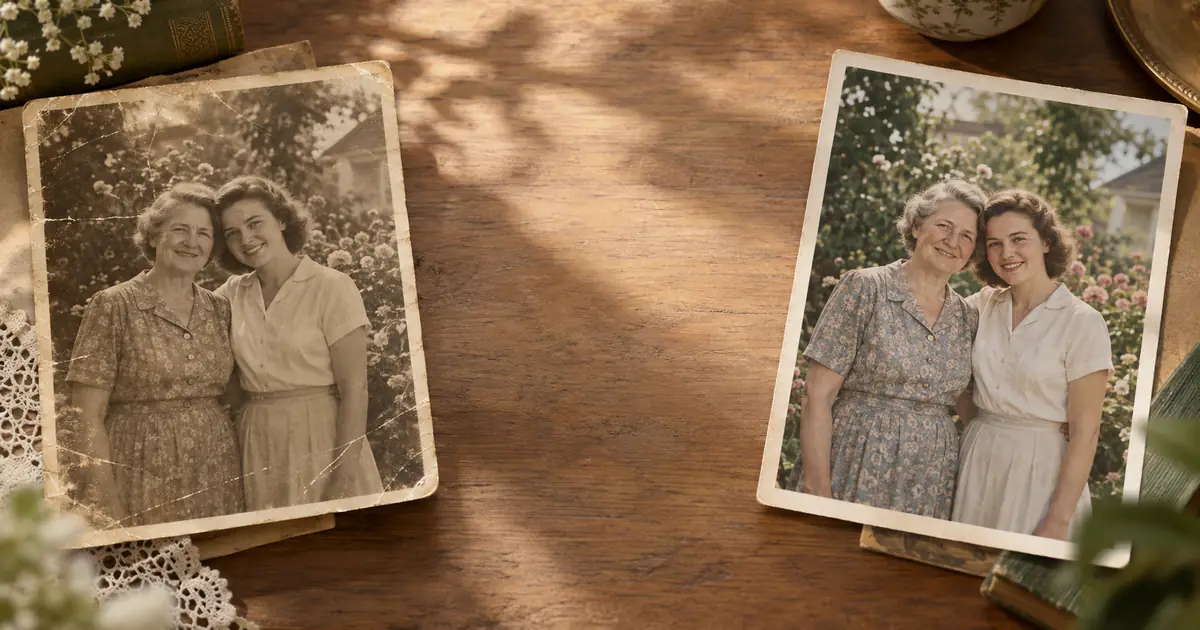
Old photos accumulate stains from water, adhesives, oil, foxing, and insect activity. This guide covers how to identify stain types, what physical treatment can do, and how AI digital restoration removes stains from scanned images.
ArtImageHub Editorial Team
Old photographs accumulate stains from many sources over decades: water, adhesives and tape, oil and grease from handling, foxing (brown spots from oxidation and fungal activity), insect activity, and chemical reactions within the print itself. Understanding which type of stain you are dealing with determines the best approach.
This guide covers how to identify the main stain types on old photographs, what physical treatment options exist, and how digital AI restoration removes stains from scanned images.
Don't Make It Worse: Identify the Stain Before Acting
The first principle with stained photographs is the same as with other damage: understand what you are dealing with before touching anything. The wrong intervention can permanently bond a stain to the emulsion or spread it further.
Water stains (tide marks): Appear as white, brown, or yellowish rings or gradient marks. The border is often more distinct than the center — the mineral deposits accumulate at the edge of where the water front stopped. Common in photos that got wet and dried without cleaning.
Adhesive and tape residue: Yellowed, slightly shiny, often with a clearly defined rectangular or strip shape corresponding to where tape was applied. Old rubber cement leaves a matte brown residue; sticky tape leaves a yellowed band with visible adhesive underneath the yellowing.
Oil and grease: From fingerprints, food, or skin contact. Slightly translucent appearance in the stained area, often with no defined edge. The surface may be slightly shiny.
Foxing spots: Small to medium brown, rust-colored, or orange spots scattered across the surface, often in clusters. Irregular in shape. May be concentrated in areas where humidity was higher. See the Foxing section below for detail.
Mold and mildew stains: Similar to foxing but sometimes with a more uniform gray or white haze in addition to spots. May have a musty odor when the photo is fresh. If active mold is visible (fuzzy surface texture), handle with care and consult a conservator.
Insect damage and frass: Irregular spot patterns from insect droppings or the tracks left by silverfish feeding on the emulsion. Often accompanied by small missing areas at the edges of the stain.
What makes any stain worse:
- Applying water or household cleaners — reactivates minerals in water stains, spreads oils, dissolves gelatin around adhesive residue
- Rubbing or scrubbing — drives stain compounds further into the emulsion and adds abrasion damage
- Using tape to repair or stabilize a stained photo — adds more adhesive, which becomes a future problem
- Attempting to peel off old tape dry — lifts the emulsion with the tape backing
Physical vs. Digital: What Each Approach Can Handle
Physical treatment (very limited for most stain types):
- Professional conservation can reduce surface adhesive residue using dry micro-mechanical techniques and specialized solvents
- Aqueous bleaching by a conservator can treat foxing spots on gelatin silver prints — this is delicate and not universally available
- Surface cleaning with a soft brush can remove loose dust and some dry surface debris before scanning
Physical treatment cannot:
- Remove deeply embedded water mineral deposits safely
- Restore color and tone that a stain has bleached out or discolored
- Lift adhesive that has bonded to the emulsion layer
- Reverse chemical changes in the emulsion from acid in adhesives or smoke
Digital restoration (what AI can accomplish):
- Remove water tide marks of any color and shape from scanned images
- Remove adhesive and tape residue patterns
- Remove foxing spots, scattered or clustered
- Remove oil stain discoloration
- Remove insect damage patterns
- Restore underlying image content in stained areas using surrounding intact pixels as reference
Digital Restoration: Scan and Repair
Step 1: Handle carefully and scan at high resolution
Use clean cotton gloves when handling. Scan the photo at 600 DPI minimum; 1200 DPI if the print is small or has dense staining that may require detailed reconstruction.
For photos with tape residue, do not attempt to remove the tape before scanning. Scan with the tape in place — removing it risks tearing the emulsion. The AI restoration handles tape residue from the scan.
Step 2: Upload to AI restoration
Upload the scan to ArtImageHub. The AI identifies stain patterns — water rings, scattered spots, yellowed bands — as damage overlaying the image content. It reconstructs the original image underneath the stain by drawing on the intact surrounding areas.
Stains are among the damage types AI restoration handles well because:
- Stains tend to cover relatively small or geometrically defined areas (unlike large missing regions)
- The image content underneath is usually intact — the stain is above it, not replacing it
- The AI has been trained on many photographs with staining and recognizes the damage signatures of water marks, foxing, and adhesive residue
Step 3: Review the result
Check the restored image at areas of heavy staining. Water tide marks over plain backgrounds (sky, walls) restore completely. Stains over complex detail (faces, clothing, architectural features) typically restore well but are worth verifying closely.
Step 4: Save both files
Keep the original scan. Use the AI-restored version for printing and sharing.
Foxing: What It Is and How to Handle It
Foxing is the common term for the reddish-brown, orange, or tan spots that appear on aged photographs and paper documents. It is one of the most frequent forms of deterioration in photographs stored for decades.
What causes foxing
The exact mechanism is still studied, but the leading explanation combines two factors:
-
Metal impurities in the paper: Iron, copper, and manganese compounds that are naturally present in many papers undergo oxidation reactions when exposed to humidity. These oxidation products produce the characteristic reddish-brown color.
-
Fungal activity: Certain molds can colonize paper and gelatin in humid conditions and produce pigmented metabolic byproducts that look similar to metal oxidation spots.
In practice, both mechanisms may occur together. Foxing is consistently associated with warm, humid storage conditions — photographs stored in attics, basements, or areas with seasonal humidity fluctuations develop foxing more commonly than those stored in climate-controlled environments.
Physical treatment of foxing
Physical removal of foxing from photographs requires professional conservation. The standard technique for gelatin silver prints uses controlled aqueous bleaching: the print is floated in a dilute bleaching solution that targets the foxing compounds while avoiding the image. This process requires:
- Precise concentration control — too strong bleaches the image itself
- The correct print type — aqueous bleaching is more appropriate for gelatin silver prints than for color prints or some older print types
- Professional judgment about whether the print can withstand wet treatment
Not all conservators offer this treatment, and the cost is typically not justified for family photos with moderate foxing when digital restoration is an effective alternative.
Digital restoration of foxing
Foxing spots are extremely well-suited for digital restoration:
- The spots are localized damage in otherwise intact image areas
- Each spot is small relative to the overall image
- The image content around the spot provides clear context for reconstruction
Scan the foxed photo at 600–1200 DPI and upload to ArtImageHub. The AI identifies foxing spots as damage patterns and removes them from the digital image, reconstructing the tone and texture of the original content. Even dense clusters of foxing spots — covering significant portions of a print — typically restore cleanly.
Preventing foxing
Reduce humidity. Store photographs below 50% relative humidity. Foxing risk increases sharply above 60–65% RH.
Use archival enclosures. Acid-free sleeves and folders prevent the environmental exposure that accelerates oxidation.
Separate from paper documents. Acidic paper degrades faster and can transfer acid to photos stored with it.
Avoid attics and basements. These spaces have the most humidity and temperature variation. A climate-controlled interior closet is significantly better.
For a complete treatment of foxing identification, professional conservation options, and step-by-step digital restoration workflow, see the dedicated foxing removal guide.
Tape and Adhesive Residue: Special Considerations
Old adhesive materials on photographs deserve specific attention because they are the stain type where physical intervention carries the most risk.
Do not peel old tape dry. The adhesive degrades over time and bonds more firmly to the emulsion than to the tape backing. Peeling dry lifts emulsion with the tape.
Humidity softening before removal (professional only): A conservator may be able to soften old tape adhesive enough to remove the backing without lifting the emulsion. This requires precise humidity control and the right solvent for the specific adhesive type. Not appropriate as a home technique.
Scan with the tape in place. For digital restoration, the tape and its residue is a surface pattern the AI restoration can remove. You get a better result from a scan of the intact print (with tape) than from a scan of a print where a home removal attempt tore the emulsion.
Special Cases: Mold Stains and Insect Damage
Active mold vs. dried mold stains: If a photo has active mold growth — visible fuzzy surface texture or a strong musty odor — handle it carefully in a well-ventilated area to avoid spreading spores. Place it in a sealed bag and consult a conservator before scanning. Once mold has dried and become inactive, the residual stains look similar to foxing (brown or gray spots and haze) and respond similarly to AI digital restoration from scans. The difference is that dried mold stains may also include small areas of physical emulsion damage where the mold fed on the gelatin.
Insect damage (silverfish, booklice): Silverfish and booklice feed on the starch and gelatin in old photographs. The damage looks like irregular pale areas, sometimes with small notches at print edges, accompanied by fecal spots (tiny dark specks) and sometimes a powdery residue. The pale feeding areas represent actual emulsion loss — the image material has been consumed. Digital AI restoration handles these areas as missing-content zones: it fills in the gaps using surrounding context, producing a plausible reconstruction. The result is good for backgrounds and non-facial areas; faces in the damage zone may require close review. Scan and restore digitally; physical treatment has nothing to offer for emulsion loss.
Combination damage: Photographs frequently have more than one stain type — foxing combined with water staining is common, as is adhesive residue combined with acid yellowing from the adhesive's chemicals. AI restoration handles combination damage in a single pass. Identify which stain types are present to set expectations for the result, but you do not need to address them separately.
When to See a Professional Conservator
Professional conservation makes sense for stained photos when:
- The print has significant historical or monetary value
- Foxing is severe and spreading actively
- Tape or adhesive is causing active damage (emulsion lifting under the tape edge)
- The print type is unusual (daguerreotype, ambrotype, albumen print) — these require specialized knowledge
- A conservator's condition report would be valuable for insurance or donation purposes
Frequently Asked Questions
Can stains be removed from old photos? Physically, most stains require professional conservation — household cleaning methods damage the emulsion. Digitally, stains are removed from scanned images very effectively by AI restoration.
How do you remove water stains from old photos? Physical removal requires a professional conservator. The practical solution for most family photos: scan at high resolution, use AI restoration to remove the tide-mark patterns digitally.
What are foxing spots on photographs? Brown, rust-colored, or orange spots from chemical oxidation and possibly fungal activity. Extremely common on photographs stored in humid conditions over decades.
Can foxing be removed from photos? Physically, only by a professional conservator using aqueous bleaching. Digitally, AI restoration removes foxing spots from scans very reliably — the spots are small and localized, exactly what AI handles best.
How do you remove adhesive or tape stains from old photos? Do not peel tape dry — this lifts the emulsion. Scan the photo with tape in place and restore digitally. Professional conservators may be able to reduce adhesive residue, but complete removal is not always possible.
Ready to bring your own photos back to life? Try ArtImageHub's photo restoration tool — see what it can do with your own image.
Share this article
Ready to Restore Your Old Photos?
Try ArtImageHub's AI-powered photo restoration. Bring faded, damaged family photos back to life in seconds.