
Fix Photos Stuck to Glass: Physical & Digital Repair Guide
Photographs bond to glass frames over decades when moisture causes the gelatin emulsion to fuse to the surface. This guide covers how to assess the damage, safe separation techniques, and how to restore the image digitally.
ArtImageHub Editorial Team
Photographs fused to glass frames are one of the more difficult physical repair situations: the emulsion has bonded to a smooth, rigid surface, and any attempt to separate without preparation typically tears the image layer away from the print.
This guide explains why the bonding happens, how to assess your specific situation, what physical approaches are available, and how to recover the image digitally whether or not physical separation succeeds.
Don't Make It Worse: Assess Before You Act
Before attempting anything, understand what you are dealing with. Photographs stuck to glass exist on a spectrum from lightly adhered to fully fused.
Signs the bond is partial or recent:
- The photo can be seen to have air gaps or bubbles between it and the glass at some edges
- The adhesion happened after a specific incident (a flood, a leak, a period of high humidity) that you can date
- The frame is less than 10–15 years old
Signs the bond is complete and long-standing:
- The photo appears uniformly flat against the glass, with no visible gaps
- Tapping gently on the frame glass does not reveal any movement or separation
- The frame has been stored for decades without being moved
What makes the situation worse:
- Attempting to peel or force the photo away from the glass while it is dry — this shears the emulsion layer from the paper backing and leaves parts of the image on the glass permanently
- Using heat (a hairdryer, a warming plate) — heat accelerates the bonding and increases the risk of emulsion damage
- Adding water directly to the photo — water causes gelatin to swell unevenly and can cause blistering, mold, and adhesion spreading
- Removing the print from the frame without a plan — once the backing is out of the frame, you lose the tension that may be holding the print flat
The safest immediate action is usually no action: keep the framed photo in a stable, dry environment while you decide on an approach.
Physical vs. Digital: What Each Approach Can Handle
Physical separation (very difficult, risk of permanent damage):
- Humidity chamber technique can soften the gelatin bond and allow careful separation in many partial-bond cases
- Ultrasonic humidification by a professional conservator can address more stubborn bonds
- Mechanical micro-tools (fine spatulas, dental picks) can separate lifted corners
- Results are not guaranteed — complete bonds may not separate without tearing
Physical treatment cannot:
- Restore emulsion that has already lifted or torn during a prior separation attempt
- Remove image material that has fused to the glass and separated from the paper backing
- Reverse chemical changes in the emulsion from prolonged glass contact
Digital restoration (what AI can accomplish):
- Recover a complete, high-resolution image from a scan taken through the glass or from a scan after separation
- Remove distortion, softness, and color shifts caused by the glass diffusion effect
- Repair any emulsion damage marks, color loss, or surface damage visible in the scan
- Reconstruct areas where emulsion has transferred to the glass and left gaps in the image
For most cases, the practical path is: attempt controlled separation if the bond is partial, scan at high resolution whatever state the print is in, then restore digitally.
Digital Restoration: Scan First, Repair After
Step 1: Scan through the glass if separation is uncertain
If you are unsure whether separation is safe, scan the photo while it is still fused to the glass. Place the frame face-down on a flatbed scanner. Clean the scanner glass and the outer surface of the frame glass before placing.
Set the scanner to 1200 DPI minimum. The glass adds a small amount of optical softness to the scan, but at 1200 DPI there is enough pixel data for AI restoration to work with. Scan as PNG for maximum quality.
This step locks in a digital record before any physical intervention. If a separation attempt later damages the print, you still have the scan.
Step 2: Attempt controlled separation only if conditions are right
If the bond appears partial and the print has archival value, the humidity chamber technique is the lowest-risk approach:
- Remove the frame backing and backing board, leaving the print-and-glass sandwich
- Place the glass-print combination face-up in a clean sealed container (a large plastic bin with a tight lid works)
- Place a small dish of distilled water in the container — positioned so no water touches the frame or print
- Seal the container and leave for 30–60 minutes
- Check whether the print has softened at the edges by very gently testing with a thin, smooth spatula at one corner
- If the bond has softened, work slowly from the most-lifted corner using the spatula flat against the glass — do not lever or bend
- If resistance is felt, return to the humidity chamber for another 30 minutes before trying again
Do not rush this process. A separation that takes two hours is a success; an emulsion tear in two minutes is permanent damage.
Step 3: Scan after separation (or rescan for higher quality)
After successful separation, allow the print to dry flat on a clean surface under a light weight (a book on top of clean tissue paper) for 24 hours. Then scan at 600–1200 DPI. This rescan will typically be sharper than the through-glass scan.
Step 4: Restore digitally
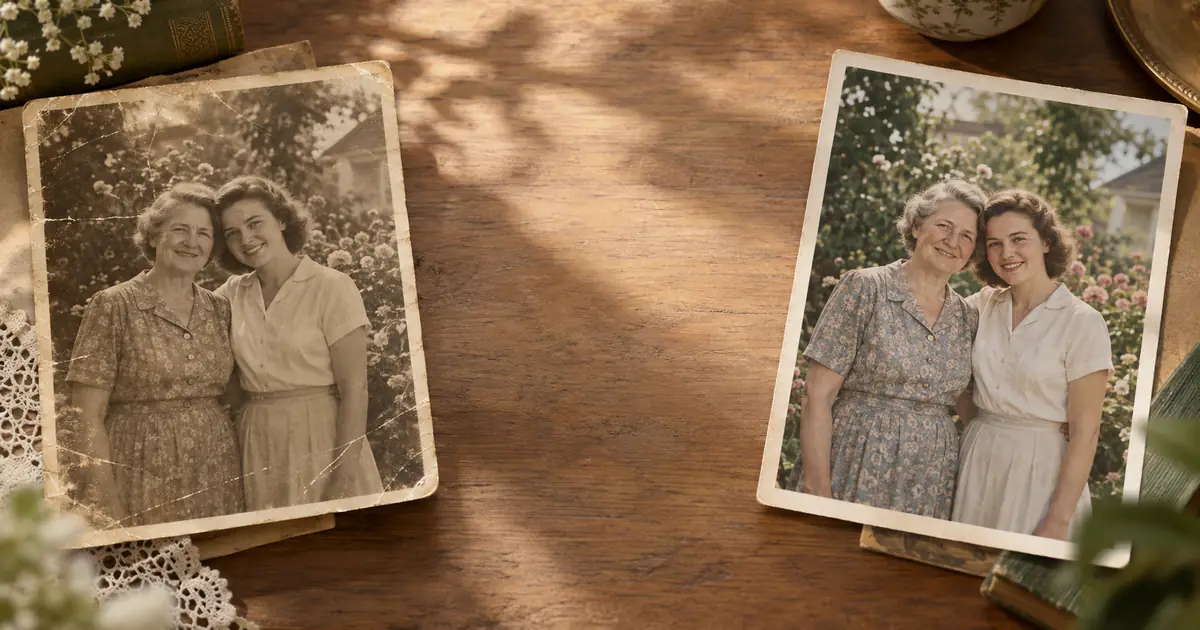
Upload the scan to ArtImageHub. AI restoration addresses:
- Surface damage marks from the glass contact
- Color shifts and chemical discoloration from prolonged glass adhesion
- Softness or blur from scanning through glass
- Emulsion damage at edges where lifting occurred
The AI identifies damage patterns and reconstructs the image from the surrounding intact content.
Step 5: Save both versions
Keep the original scan (through-glass or post-separation) at full resolution as your archival record. Use the AI-restored version for printing and sharing.
Physical Separation: Step-by-Step for Partial Bonds
If you can see air gaps at edges and the bond appears partial, controlled manual separation may be possible without the humidity chamber:
Materials needed:
- A thin, flexible micro-spatula (the type used in bookbinding or conservation work — not a metal knife or credit card)
- Clean cotton gloves
- A clean, flat surface to work on
- Good lighting (magnification lamp if available)
Process:
- Work at the most-lifted corner, where the gap is already present
- Slide the spatula into the gap with minimal force, keeping it flat against the glass
- Move the spatula slowly along the edge, extending the separation
- Do not attempt to pull the photo up — separate parallel to the glass
- If resistance increases at any point, stop
If the print does not separate easily at the edges, do not continue — use the humidity chamber or consult a professional.
Special Cases
Photos stuck to non-standard glass (UV-filtering, anti-reflective): These glass types have coatings that can interact with the emulsion differently. The humidity chamber approach is the same, but the anti-reflective coating on some glass types can create additional adhesion. Consult a conservator for coated glass.
Multiple prints stuck together inside a frame: When a frame contains several prints that have all bonded to each other and to the glass, separate the stack from the glass first (if possible), then address print-to-print adhesion as a separate problem. Do not attempt to separate all layers simultaneously.
Color prints vs. black-and-white: Modern color prints (chromogenic prints) have a different emulsion structure than black-and-white gelatin silver prints. Chromogenic prints are more prone to color dye migration when wet — the humidity chamber approach carries more risk for color prints. Digital restoration is often the better primary path for color print cases.
Daguerreotypes and tintypes in glass-covered frames: These pre-gelatin photo types should not be treated with any moisture. The image is on a metal surface, and moisture damages them permanently. If a daguerreotype is stuck to its cover glass, consult a professional conservator immediately and do not attempt any self-treatment.
Photo has partially transferred to the glass: If some emulsion (carrying image content) has transferred to the glass and separated from the paper, scan the glass separately after the paper is removed. The transfer image may be partially recoverable. A conservator may be able to consolidate it, but this is advanced work.
When to See a Professional Conservator
Professional conservators have tools and techniques not available in home settings:
- Ultrasonic humidification delivers moisture more evenly and controllably than a water dish chamber
- Vacuum suction tables can hold the glass stable while the print is peeled, preventing flex and cracking
- Consolidants can stabilize lifting emulsion before separation
Seek a professional conservator when:
- The print has significant historical or monetary value
- The bond is complete with no visible gaps
- Prior home separation attempts have started to lift or tear the emulsion
- The print is a daguerreotype, ambrotype, tintype, or other non-gelatin type
Preventing Future Glass Adhesion
Use spacers in frames. A small mat, spacer, or frame insert keeps the photo surface away from the glass. Even a 1–2mm gap prevents contact-adhesion.
Control humidity. Photograph storage and display areas should be kept below 50% relative humidity. High-humidity environments accelerate the bonding process.
Choose appropriate glass. UV-filtering glass reduces heat buildup and slows chemical degradation. Museum glass (anti-reflective + UV-filtering) is the archival standard for displayed prints.
Inspect stored frames periodically. Check frames in storage every few years for signs of contact adhesion at edges. Early-stage bonds are much easier to reverse than long-standing ones.
Store originals, display copies. For prints you want to frame and display, consider framing a copy made from the AI-restored digital version. Store the original flat in an archival envelope in a controlled environment.
Frequently Asked Questions
Can a photo stuck to glass be removed? Sometimes. Partial bonds can often be reversed with a humidity chamber technique. Complete long-standing bonds may not separate without tearing the emulsion. Scanning through the glass and restoring digitally is a reliable alternative.
How do you get an old photo unstuck from glass? Use a humidity chamber: sealed container, small dish of distilled water (not touching the photo), 30–60 minutes, then attempt gentle separation with a thin spatula starting at a lifted edge. Never peel dry.
Can you scan a photo stuck to glass? Yes. Place the frame face-down on a flatbed scanner at 1200 DPI. The glass adds softness but the result is workable for digital restoration.
What causes photos to stick to glass? Moisture from humidity, temperature cycling, or water exposure causes gelatin emulsion to wet-bond to adjacent surfaces. When the print dries in contact with glass, the bond becomes permanent over time.
What is the difference between photos stuck together and photos stuck to glass? Print-to-print bonds can sometimes be peeled carefully. Glass bonds are different: the glass is rigid, and the emulsion fuses to its smooth surface. Pulling always creates risk of emulsion lifting in sheets. Use the humidity chamber for both, but be more conservative with glass-fused prints.
Ready to bring your own photos back to life? Try ArtImageHub's photo restoration tool — see what it can do with your own image.
Share this article
Ready to Restore Your Old Photos?
Try ArtImageHub's AI-powered photo restoration. Bring faded, damaged family photos back to life in seconds.