
Fix Scratched Photos: Physical & Digital Repair Guide
Scratched photos range from surface-only marks to deep emulsion gouges. This guide covers how to assess the damage, what physical treatment can and can't do, and how AI digital restoration handles scratch removal.
ArtImageHub Editorial Team
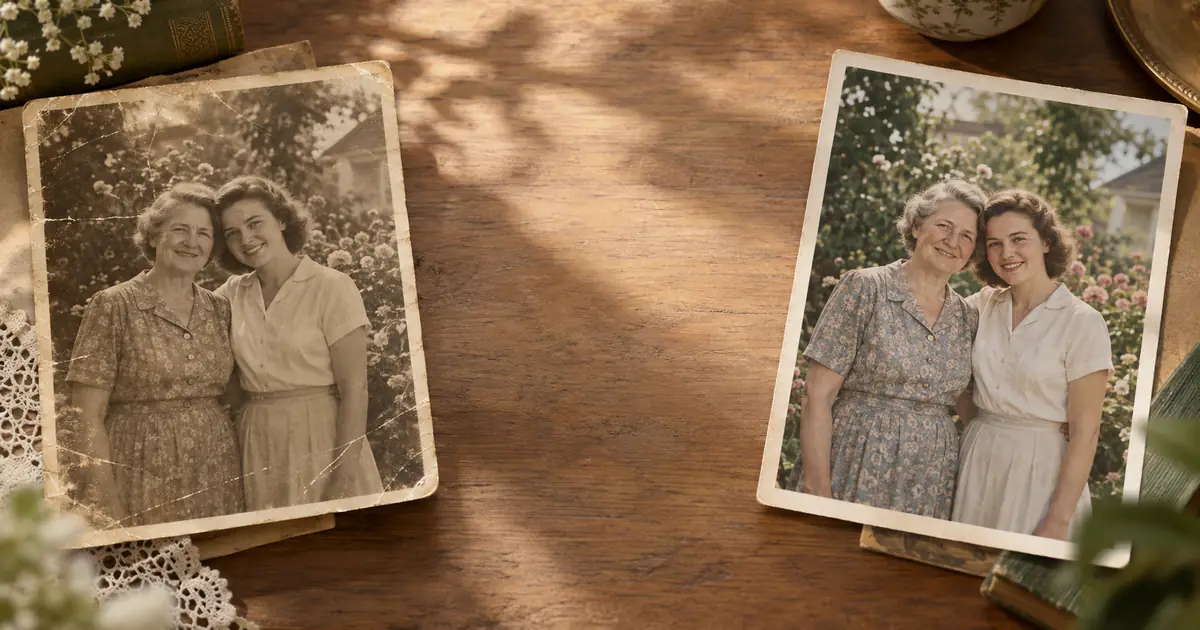
Scratched photographs are among the most common types of photo damage — and among the most effectively treated by digital restoration. A scratch in the original print is a permanent physical change, but the same damage in a digital scan is a pattern that AI restoration removes reliably.
This guide covers how to assess scratch damage, when physical treatment is appropriate, and how to run the digital restoration workflow that produces the cleanest result.
Don't Make It Worse: Assess Before You Act
Before doing anything else, understand what type of scratch you are dealing with — this determines both the urgency and the appropriate approach.
Surface scratch (coating only): The scratch is in the protective surface coating of the print, not the emulsion itself. Under raking light (a bright light source from the side), it catches light and appears shiny. The image content beneath appears intact. These are the least severe type of scratch.
Emulsion scratch: The scratch has penetrated through the coating into the gelatin emulsion where the image is formed. It appears matte rather than shiny under raking light, and you may see a slight difference in color or tone along the scratch line compared to the undamaged areas around it.
Through-scratch (emulsion and paper): The most severe type. The scratch has gone through both the emulsion and into the paper support. These appear as white or light-tan lines in the image, showing the paper backing exposed beneath the image layer. Complete image information is missing along the scratch path.
What makes it worse:
- Polishing or buffing the print surface with cloth — this can round off the edges of an emulsion scratch, making it harder to fill digitally, and can spread debris into the scratch channel
- Applying nail polish, petroleum jelly, or commercial scratch fillers — these alter the optical properties of the surface and contaminate the emulsion
- Cleaning with anything abrasive — adds micro-scratches to existing damage
- Sliding prints face-down or face-to-face across any surface
The single most important step is to scan the photo before any physical treatment.
Physical vs. Digital: What Each Approach Can Handle
Physical treatment (very limited for scratches):
- Removing loose debris from the scratch channel with a soft brush
- Applying a reversible conservation-grade coating to surface scratches under professional supervision
- Stabilizing the print to prevent further damage
Physical treatment cannot:
- Fill in emulsion loss from scratches
- Restore image content along the scratch path
- Remove visible scratch lines from the image
Digital restoration (what AI can accomplish):
- Remove scratch lines of any severity from the image scan
- Fill in missing image content along the scratch path using surrounding context
- Restore color, tone, and texture along repaired scratch lines
- Handle multiple scratches, cross-hatched scratch patterns, and extensive scratch damage in a single pass
For virtually all scratch damage on photographs, the correct approach is: scan the photo, run AI restoration, get a clean digital image. Physical treatment of the print is secondary and often unnecessary for the goal of recovering the image.
Digital Restoration: Scan First, Repair Fast
Step 1: Scan the photo at high resolution
Use a flatbed scanner at 600 DPI minimum for standard prints. For wallet-size photos, prints with fine detail, or photos with hairline scratches, use 1200 DPI. Scanning at higher resolution gives the AI more pixel data along the scratch edges to work from, which improves the reconstruction.
Place the photo face-down on the scanner glass. Clean the scanner glass first — dust on the glass can appear as additional marks in the scan. Scan as PNG for maximum quality.
Step 2: Upload to AI restoration
Upload the high-resolution scan to ArtImageHub. The AI identifies linear damage patterns — scratches, cracks, crease lines — and treats them as regions to reconstruct. It removes the scratch and fills in the image content from the surrounding pixels.
Scratches are among the damage types AI photo restoration handles most reliably. This is because:
- Scratches are linear (predictable pattern for the AI to identify)
- The image on either side of the scratch is usually intact, giving the AI good context for reconstruction
- The AI has been trained on many photographs with scratch damage and recognizes the visual signature
Step 3: Review the result
Check the restored image at full resolution. Isolated scratches on simple backgrounds (sky, walls, fabric) restore cleanly. Scratches across complex detail — a face, a pattern, architectural detail — also typically restore well, but it is worth verifying these areas closely against the original scan.
For photos with many scratches or cross-hatched scratch patterns, the AI processes all of them in a single pass. The result is usually clean throughout.
Step 4: Save and use both versions
Keep the original scan at full resolution. Use the AI-restored version for printing and sharing.
What AI restoration handles well with scratches
Handles well:
- Single scratches of any width or depth, across any background type
- Parallel or cross-hatched scratch patterns from storage damage
- Through-scratches (white lines showing paper backing) across faces, clothing, background
- Fine hairline scratches in large numbers (from handling without gloves)
- Scratches combined with other damage (fading, color shift, water staining)
More difficult:
- Very wide scratches (more than 2–3mm) where a large area of image content is missing
- Scratches through faces where critical facial features (eyes, nose, mouth) fall entirely within the scratch zone
Physical Treatment: When It's Worth Attempting
Physical treatment of scratched photographs is rarely necessary for image recovery — digital restoration handles this reliably. Physical treatment makes sense in two situations:
1. The physical print has archival or historical value beyond the image. If the print itself is a significant object (a signed photograph, a historically significant original), a conservator can apply a reversible conservation coating to stabilize the surface and reduce the visual prominence of surface scratches.
2. The photo will be handled frequently and you want to prevent further damage. A conservator can apply protective coatings or provide archival housing recommendations that reduce the risk of additional scratching.
For standard family photos where the goal is recovering the image, physical treatment is not the priority — scan first, restore digitally.
Special Cases
Negatives with scratches: Scratched film negatives can still be scanned and digitally restored. Scratches on the base side of film (non-emulsion side) are easier to minimize optically during scanning; emulsion-side scratches are more severe but still scannable. Use a film scanner at 2400+ DPI for negatives. The AI handles scratch patterns on negative scans similarly to prints.
Slides (transparencies) with scratches: Scratched slides should be scanned in a dedicated slide scanner or on a flatbed with a transparency adapter. Surface scratches on slide film sometimes cause light to scatter around the scratch area, creating a glowing halo effect in scans. The AI restoration handles both the scratch line and the scatter artifact.
Photos with scratches and missing emulsion chips: If the scratch has caused pieces of emulsion to detach and fall away (loose chips are visible), do not shake or brush the print surface. Place the photo face-up in an archival folder and transport carefully. Scan before any additional handling. Missing emulsion produces larger reconstruction areas for the AI, but the result is usually still good.
Very old prints (pre-1900): Albumen prints and other 19th-century photo types have thin, brittle emulsion layers that scratch easily. Do not attempt any physical polishing on these — the emulsion can crumble. Scan at 1200 DPI and restore digitally.
When to See a Photo Conservator
Professional conservation makes sense for scratched photos when:
- The print itself is a historically or personally irreplaceable object (not just the image)
- Emulsion is actively lifting or flaking at scratch edges
- The print is extremely fragile and requires professional handling for safe scanning
- You want a professional assessment of whether physical stabilization would benefit the object
Preventing Future Scratches
Store prints in archival enclosures. Individual acid-free envelopes or sleeves prevent prints from sliding against each other or against album pages.
Handle by edges, not surfaces. Skin oils and fingernails are the most common causes of surface scratches on frequently handled prints.
Never stack face-to-face without a barrier. Dust or debris between stacked prints acts as abrasive. Use clean tissue or acid-free interleaving paper between stacked prints.
Clean scanner glass before each use. Grit on the scanner glass is pressed against the print surface during scanning and can add scratches to an already-damaged print.
Store originals, display copies. For photos you want to look at regularly, display a quality print made from the restored digital version. Store the original in archival conditions.
Frequently Asked Questions
Can scratched photos be repaired? Yes, through digital restoration. Physical scratches in a print are permanent, but AI restoration removes scratch lines from scans very effectively — it is one of the most reliable types of photo repair.
How do I know if a scratch is surface or emulsion damage? Check under raking light: surface scratches appear shiny and reflective; emulsion scratches appear matte and may show color differences. Either type scans well and restores digitally.
Should I try to fill scratches on old photos before scanning? No. Scan the photo as-is. Fillers and polishes damage the emulsion and make the scan worse. The AI works better from a clean scan of the damage.
Can AI remove scratches from photos? Yes, very effectively. Scratch patterns are among the damage types AI restoration handles most reliably.
What causes scratches on old photos? Handling without gloves, storage in abrasive paper envelopes, stacking without interleaving, debris between stacked prints, and cleaning with any abrasive material.
Ready to bring your own photos back to life? Try ArtImageHub's photo restoration tool — see what it can do with your own image.
Share this article
Ready to Restore Your Old Photos?
Try ArtImageHub's AI-powered photo restoration. Bring faded, damaged family photos back to life in seconds.