
Fix Mold and Mildew Damaged Photos: Physical & Digital Repair Guide
Mold and mildew on photos destroy emulsion and paper permanently — but digital restoration can save the image even when the print is beyond physical repair. Here's the full process.
ArtImageHub Editorial Team
A photo with mold damage needs two separate decisions: what you can do physically to stop the damage from progressing, and how to recover the image itself. For most mold-damaged photos, digital restoration is the only path to recovering the image in a usable form — the physical print may not be salvageable.
Don't Make It Worse: Immediate Steps
Mold requires moisture to survive. If you've found mold-damaged photos, the most important first step is removing the moisture source.
Separate the affected photos immediately. Mold spreads from print to print when photos are stored together. Isolate anything showing active mold — spots, fuzzy growth, musty odor — from undamaged photos right away.
Air dry, don't heat dry. If photos are wet or damp, allow them to air dry at room temperature in a clean, ventilated space. Do not use a hair dryer or place them in direct sunlight — heat accelerates further emulsion damage. Stand them upright if possible so both surfaces can dry evenly.
Never brush or wipe dry mold across the surface. Dry mold spores are lightweight and spread easily. Wiping the surface smears active mold across undamaged areas and forces spores into the emulsion. If mold is dry, handle the photo minimally until you have decided on a cleaning approach.
Work with gloves and in a ventilated area. Mold spores are a health hazard, particularly in enclosed spaces. If a collection has significant mold damage, take precautions before handling.
Do not freeze photos with active mold as a preservation measure unless you have consulted a conservator — freezing wet photos bonds them together and can cause additional damage on thaw.
Physical vs. Digital: What Each Approach Can Accomplish
Understanding the limits of both approaches helps you make the right decision about how to spend your effort.
Physical treatment (what conservators can attempt):
- Stopping active mold by thorough drying
- Carefully removing dried mold residue from the photo surface with specialized tools under magnification
- Stabilizing the remaining print for archival storage
- Humidifying and flattening warped prints
Physical treatment cannot:
- Restore emulsion that has been consumed or etched by mold
- Return color to areas where dye layers have been destroyed
- Fill in pits or craters left in the gelatin emulsion
- Reverse the chemical deterioration mold acids cause
Digital restoration (what AI can accomplish):
- Recover the full visible image information from a scan, regardless of physical print condition
- Fill in mold spots, stains, and damaged areas using context from surrounding intact image
- Restore color balance disrupted by mold staining
- Produce a clean, printable digital version of the image
For most family photos with mold damage, digital restoration is the practical path. Physical conservation of the print makes sense for historically significant or irreplaceable objects where the physical artifact has value beyond the image — for family snapshots, recovering the image digitally is the goal.
Digital Restoration: Scan First, Then Repair
The digital restoration workflow for mold-damaged photos follows the same path whether the damage is light spotting or more extensive.
Step 1: Scan the photo before any cleaning attempts
Scan the photo at its current state — 600 DPI minimum, 1200 DPI for small prints or photos with significant fine detail. If the photo is warped from moisture, place it face-down on the scanner glass and allow its own weight to flatten it slightly. If it curls off the glass significantly, scan face-up and accept slightly uneven focus in the warped areas.
Do not attempt to clean the photo before scanning if cleaning risks further damage. The scan captures whatever image information remains.
Step 2: Upload to AI restoration
Upload the scanned file to an AI restoration tool. ArtImageHub is designed specifically for old photo damage including spotting, staining, and emulsion loss — damage patterns that share characteristics with mold damage.
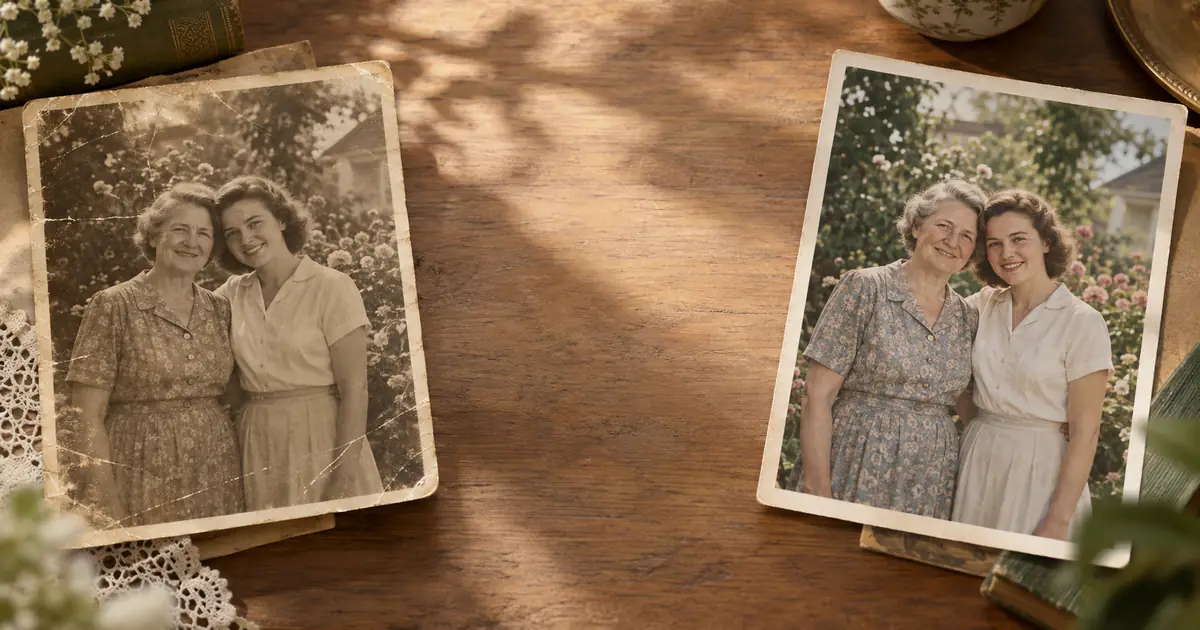
The AI analyzes the image, identifies damaged regions, and reconstructs them based on the surrounding intact content and its training on many types of photo damage. Mold spots are handled similarly to scratch marks or foxing spots — the AI infers what should be in each damaged area and fills it in.
Step 3: Compare the restored version to the original scan
The AI output will show what was recovered. Compare areas of mold damage between the original scan and the restored version — most spotting and moderate staining is resolved in a single pass. Some areas of extensive image loss may still show artifacts or incorrect reconstruction; in those cases, the original scan and the restored version together give you the most complete picture.
Step 4: Save and archive both versions
Keep the original high-resolution scan as your preservation copy — it documents the print's actual state and can be re-processed with future tools. Use the restored version for sharing, printing, and display.
What AI restoration handles well vs. poorly with mold damage
Handles well:
- Scattered spots and irregular staining over an otherwise intact image
- Color shifts across mold-affected areas (common in color prints)
- The soft border around mold spots where the emulsion is partially degraded
- Dark staining on lighter areas, light staining on darker areas
More difficult:
- Large contiguous areas of complete image loss (no pixel data to infer from)
- Mold-damaged faces where significant facial detail has been destroyed
- Dense mold coverage over an entire print where very little original image survives
Physical Cleaning: When and How
If you choose to attempt physical cleaning of the print after scanning (either to preserve the original or to improve the scan quality for another pass), this is the general approach used by conservators:
For active (wet) mold: The priority is drying. Place the photo on clean absorbent paper in a dry, ventilated area. Replace the absorbent paper as it absorbs moisture. Do not blot the photo surface — allow evaporation. Active mold requires professional conservation treatment for best results.
For dry mold residue: In a well-ventilated area with gloves, very lightly brush the surface of the photo with a very soft, clean artist's brush to dislodge loose dry residue. Do not apply pressure. Brush in one direction, away from the image area if possible. This removes loose surface material without forcing it into the emulsion.
Do not use water, chemical cleaners, or household cleaning products on photographs. Water reactivates mold, and most chemical cleaners attack the emulsion and dye layers. Proper photo conservation cleaning requires buffered solutions and methods specific to the photograph type — this is professional territory.
Special Cases
Albumen prints (19th century photographs): These prints have a thin egg-white coating over the paper that is particularly susceptible to mold. The albumen layer can crack and lift at mold damage sites, taking emulsion with it. Handle with extreme care.
Color prints from the 1970s–1980s: These prints often already have unstable dyes. Mold damage on already-faded color prints may be difficult to distinguish from dye fading — scan and let the AI restoration address all damage types together.
Photos stuck together: If mold has caused prints to stick together, do not force them apart. Scan what is visible, and see a conservator for separation — forced separation destroys both prints.
Negatives with mold: Film negatives can also suffer mold damage. Clean the base side (not the emulsion side) very gently with a lint-free cloth lightly dampened with isopropyl alcohol, then scan. Mold on the emulsion side requires professional cleaning.
When to See a Photo Conservator
Physical conservation of mold-damaged prints makes sense when:
- The photo is historically significant and the physical artifact has value beyond the image
- The damage is light and a conservator can clean the print to a displayable state
- Photos are stuck together and need professional separation
- The collection is large and you need professional triage and treatment recommendations
Find a conservator through the American Institute for Conservation (AIC) directory. Specify that you need a conservator with expertise in paper and photographic materials.
Preventing Mold Damage
Mold requires moisture. Storage environment is everything:
- Target storage conditions: below 65°F (18°C), below 50% relative humidity
- Avoid attics and basements: temperature and humidity extremes are common in both
- Use acid-free storage materials: acid-free boxes and folders create less hospitable environments for mold
- Never store photos in sealed plastic bags unless they are completely dry — trapped moisture encourages mold
- Inspect stored photos periodically — early-stage mold is far easier to address than advanced damage
Frequently Asked Questions
Can mold damaged photos be restored? Physically, mold etches the emulsion permanently — physical restoration cannot recover consumed image layers. Digitally, AI restoration can recover most mold-damaged images by scanning the remaining content and filling in damaged areas. The print may be beyond physical saving while the image can still be fully recovered.
Is it safe to clean mold off old photos? Take precautions: gloves, ventilation, and never brush dry mold across the surface. For significant damage, consult a conservator. Scan the photo first regardless of whether you plan to clean it.
What does mold do to photographs? Mold digests organic materials in the print — gelatin emulsion, dye layers, paper backing. It leaves etching, color loss, and in severe cases, complete image destruction in affected areas.
How do I scan mold damaged photos? Scan at 600–1200 DPI before attempting any cleaning. Let the AI work with the existing image data first.
Can AI fix mold spots on photos? Yes, effectively for most mold damage patterns. Scattered spots and staining over intact image content are well within AI restoration capabilities. Extensive areas of total image loss are harder but still partially recoverable.
Ready to bring your own photos back to life? Try ArtImageHub's photo restoration tool — see what it can do with your own image.
Share this article
Ready to Restore Your Old Photos?
Try ArtImageHub's AI-powered photo restoration. Bring faded, damaged family photos back to life in seconds.