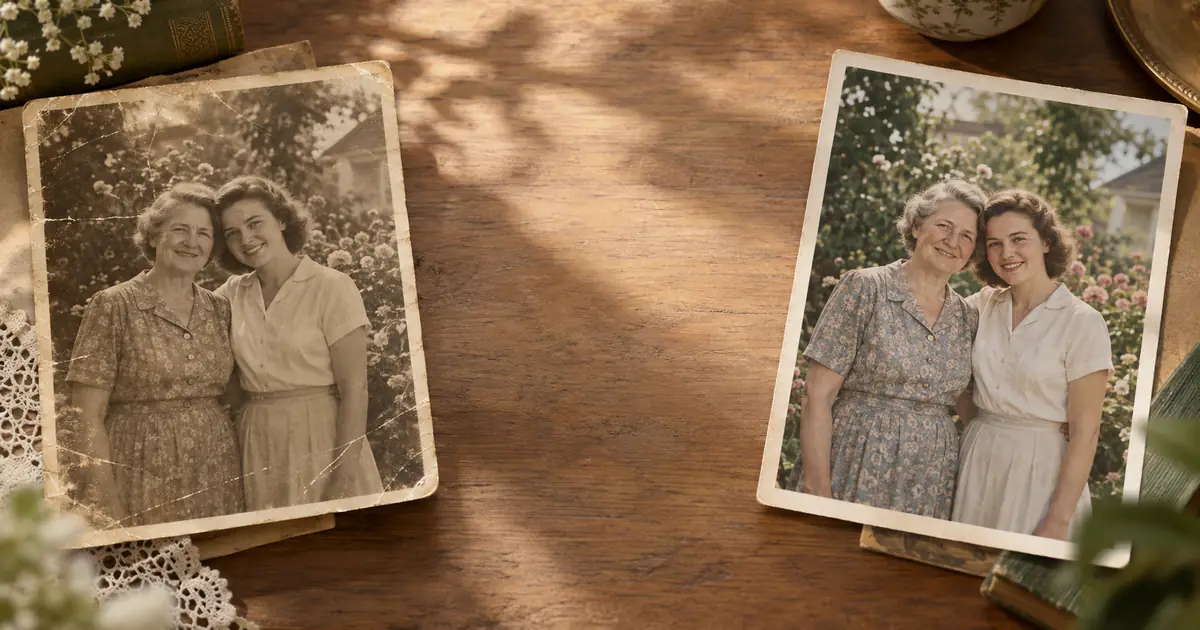
Photo Restoration Proof Sheet: Free Printable Review Template
Download a free Letter or A4 photo restoration review sheet. Label the original and candidate, record precise changes, and agree on a version before sharing or printing.
ArtImageHub Editorial Team
A photo restoration proof sheet puts the source, the candidate version, and the requested changes in one review record. Its purpose is to answer a practical question: Which version are we comfortable sharing or printing, and what still needs work? It is more useful than an unlabeled screenshot or a message that says “the face looks wrong.”
This guide includes an original, blank review sheet made by the ArtImageHub editorial team. The worksheet is free; photo processing is separate. No customer photographs are included in the template or this example.
Download the printable photo review template
Choose your paper size:
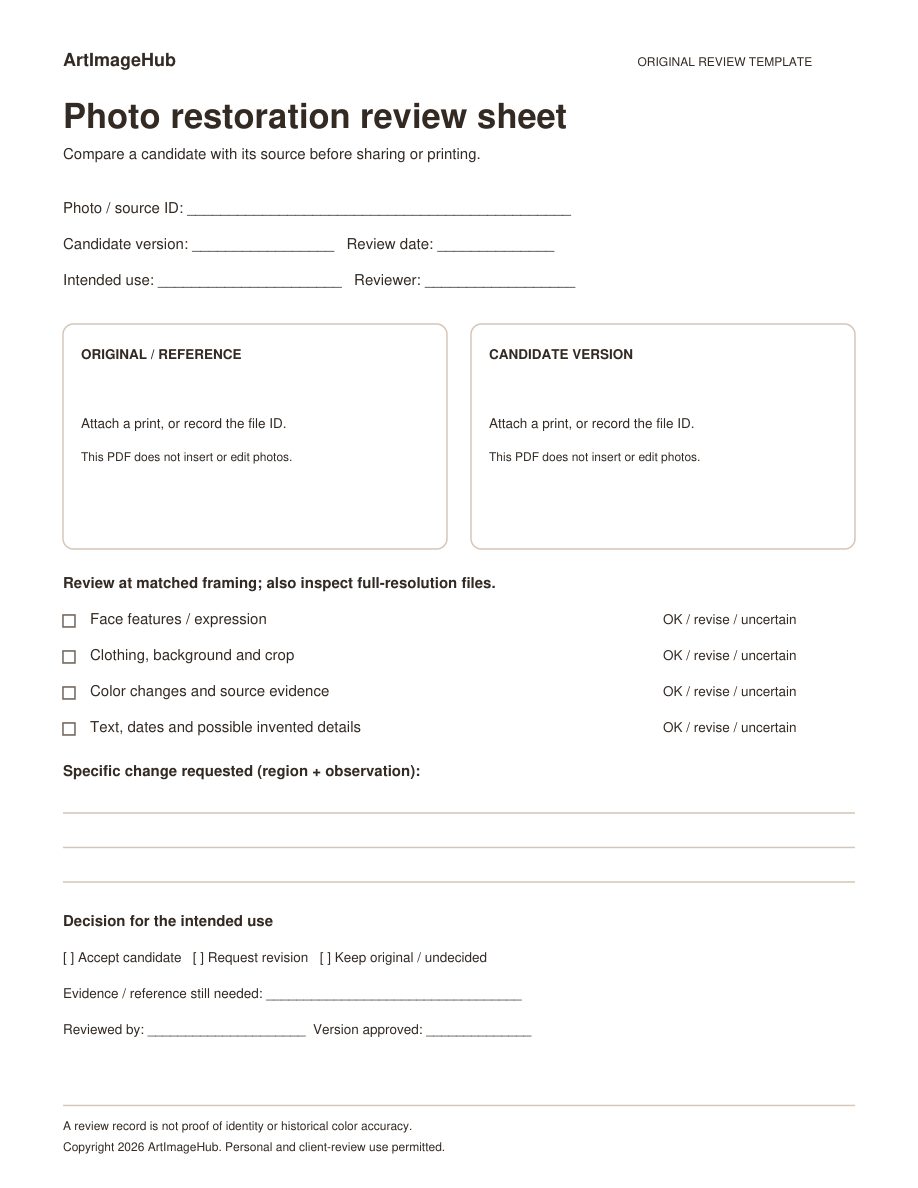
These are one-page static PDFs. They do not insert pictures, upload files, or edit a photograph. Print a sheet and attach your own comparisons, or write the filenames in the boxes and review the images separately. If you want the photos inside a digital page, recreate the two-column layout in an editor that supports image placement.
You may use these original worksheets for personal and client reviews. Permission to use the worksheet does not give permission to publish someone else's photographs.
1. Keep a source copy and give every candidate a version
Keep the unedited scan or camera file. Work on a copy and give the proposed result a different name. Do not replace your reference with the most recent edit.
A simple naming example is:
| File | Role in the review |
|---|---|
family-01-source.jpg |
Reference kept unchanged |
family-01-candidate-v1.jpg |
First proposed result |
family-01-candidate-v2.jpg |
Later revision, kept separate |
These are example names, not files from a restoration test. Put the source ID, candidate version, reviewer, date, and intended use at the top of the worksheet. “Family album print” and “archive reference” can lead to different decisions; accepting a pleasing display copy does not turn it into a factual record.
2. Make a comparison that does not hide changes
Place the source on the left and the candidate on the right. Use the same orientation and scene framing. For an overview, make the photographs occupy the same displayed width while preserving their proportions. Do not stretch one to fit or crop away the edge where an unwanted change occurred.
Then inspect corresponding details separately: a face, clothing, an important background object, or a date. A small whole-page thumbnail can hide a distorted eye or a rewritten letter. Check the full-resolution files too; matching the overview size is not a reason to overwrite the original or resample your only copy.
For a general introduction to presentation formats, see showing before-and-after restoration results. For more detailed assessment, use our restoration quality evaluation guide. This worksheet adds a versioned decision and revision record to those checks.
3. Export a labeled proof page if you already use Adobe tools
A contact sheet can put several thumbnails and their filenames in one document. It is a layout tool, not a restoration or authentication step. The following options are for readers who already have the relevant software; buying it is not required to use our blank worksheet.
In Photoshop, Adobe's current instructions use File > Automate > Contact Sheet II. Choose the source images or folder, set the document and thumbnail layout, and enable filename captions. Keep the source and candidate names unambiguous. See Adobe's Contact Sheet II instructions.
In Adobe Bridge, use the Output workspace, choose a layout, place the images in the preview, and export a PDF. Adobe documents grid, margin, caption, and PDF settings in its PDF contact-sheet guide. Check the exported page before sending it: the pair order and labels must still be clear.
A proof page of your edited digital files is different from a historic film contact sheet being scanned as an input. If that is your source, the contact-sheet restoration article addresses that separate task.
4. Write a revision someone can act on
Mark each checklist item OK, revise, or uncertain. Avoid treating “uncertain” as a defect that another AI pass must invent an answer for.
| Vague comment | More useful review note |
|---|---|
| “The face is wrong.” | “Candidate v1, person at the left: the eye shape differs from the source. Compare this crop and keep the source if no reliable correction is available.” |
| “Fix the colors.” | “The jacket changed from the source's muted tone to bright blue. Keep the source tone unless a separate reference supports a change.” |
| “The newspaper looks clearer.” | “The lettering looks different. Do not accept generated letter shapes as a transcription; retain the original scan for reading.” |
These are hypothetical review notes, not measured results or promises about a tool. Record the region, the observation, and the available reference. Ask a relative for another photograph when useful, but do not assume memory can establish an exact original color or confirm identity.
5. Choose a version for a stated purpose
The worksheet gives three decisions:
- Accept candidate: identify the exact version and intended use.
- Request revision: list the specific changes and any supporting reference.
- Keep original / undecided: use this when a candidate introduces changes you cannot justify or when the evidence is insufficient.
Keep the review page with the source and the selected file. Before printing, inspect the actual download and its pixel dimensions; a proof-sheet thumbnail does not establish print quality. Before posting publicly, get permission to share the photographs and remove private names or notes that the recipients do not need.
Where ArtImageHub processing fits
You do not need to buy photo processing to compare files you already have. If you have a digital photograph with visible damage, you can review Old Photo Restoration; for an enhancement workflow, see Photo Enhancer.
Review the current displayed offer and purchase terms before paying. ArtImageHub uses a pay-first flow: payment precedes upload. Results vary, and a candidate that looks sharper is not proof that missing details, identity, text, or original colors have been recovered. The free worksheet remains available whether or not you purchase processing.
Frequently asked questions
What is a photo restoration proof sheet?
It is a labeled comparison of a source photo and a candidate version, with notes and a decision for a particular use. It records a review; it does not certify identity, original colors, or historical facts.
Is the printable review template free?
Yes. The blank Letter and A4 PDFs are free to download without uploading a photo. They do not restore images or grant paid ArtImageHub processing access.
Can I insert photos into the downloaded PDF?
The download is a static worksheet, not an image editor or fillable upload form. Attach printed comparisons, write file references in its boxes, or recreate the layout in an editor that supports image placement.
Should the original and restored image have the same pixel dimensions?
Not necessarily. For the overview, show the same scene at the same displayed size without stretching either image. Separately inspect the full-resolution files and corresponding detail crops; a larger file is not proof of more authentic detail.
Does family approval prove an AI-restored face is accurate?
No. A relative can offer useful references, but agreement is not an identity test. Keep the original and note any uncertain features, colors, text, or dates rather than treating generated details as evidence.
Do I need to pay to compare two photos?
No. You can compare files you already have and use the worksheet without buying anything. If you choose ArtImageHub processing, review the current quoted price and purchase terms; payment comes before upload.
Share this article
Ready to Restore Your Old Photos?
Try ArtImageHub's AI-powered photo restoration. Bring faded, damaged family photos back to life in seconds.